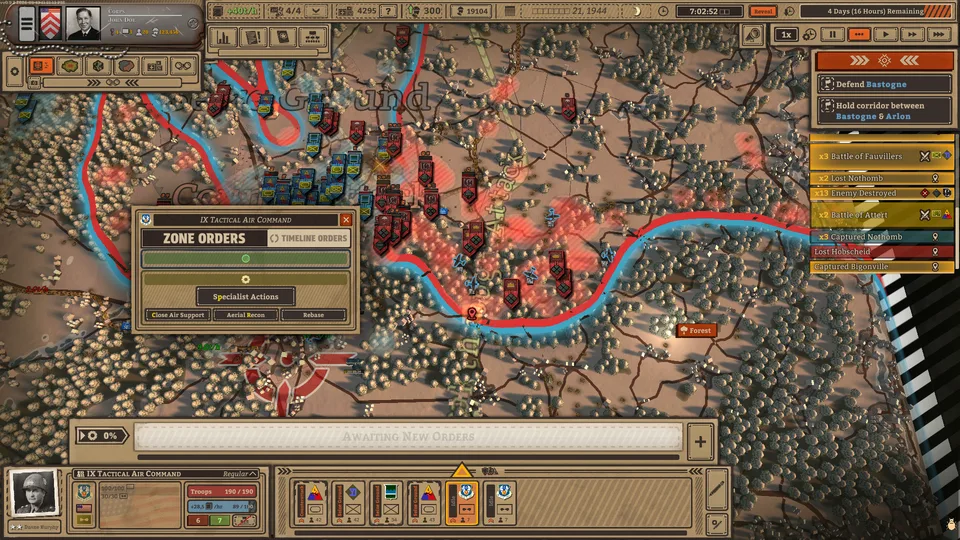
Master Battleplan Operation Cobra with tactical insights, breakthrough strategies, and historical campaign planning tips for Foolish Mortals Games Inc.'s strategy title.
Published: Battleplan Wiki Editorial Team
Table of Contents
Hitting the Hedgerows: Understanding Operation Cobra in Battleplan
Operation Cobra represents one of the most challenging tactical milestones in Foolish Mortals Games Inc.'s strategy title, Battleplan. Set against the backdrop of the historical July 1944 Allied breakout in Normandy, players must navigate dense hedgerows, fortify corridors, and manage armored divisions under intense German pressure. According to community reports and player experiences, attempting to execute overly complex maneuvers like early deep encirclements around St. Lô frequently leads to supply depletion and heavy casualties. Instead, establishing a disciplined front line, timing heavy bomber wings effectively, and coordinating artillery barrages are essential to securing steady progress.
Strategic positioning dictates the opening phase of the mission. Players must balance offensive armored pushes with defensive infantry holdings along the western flank. Utilizing specialized doctrines—such as ambush positioning for static infantry units—allows commanders to secure flanks without committing active offensive resources where they are not needed.
Initial Positioning: Assign infantry divisions to hold the river lines and secure the western flank while positioning your main armor divisions for a direct breakthrough toward St. Lô.
Pre-Attack Bombardment: Initiate multi-hour artillery barrages and coordinate close air support missions before launching your armored units forward.
The Breakthrough Attack: Execute targeted breakthrough commands rather than risky deep encirclements to prevent your armored units from instantly running out of supplies.
Carpet Bombing Execution: Deploy heavy bomber wings directly onto concentrated enemy defensive lines just as large engagements begin to trigger mass surrenders.
Managing Supply Lines and Avoiding Attrition
One of the most common pitfalls reported by players in community discussions is the severe strain placed on supply networks during extended pushes. When armor divisions push deep into enemy territory without secure road connections, supply lines stretch to a breaking point, halting momentum and leaving units vulnerable to counterattacks.
To maintain offensive pressure, commanders must synchronize their infantry advance with armored spearheads. As captured in player gameplay logs, failing to double-stack defensive positions around key hubs like St. Lô often results in broken corridors and cut-off supply depots.
Tip
Keep Roads Open: Always ensure your defensive infantry lines shift forward alongside your tanks to maintain an open corridor back to supply points.
Resupply Early: Monitor unit morale and supply status closely. Pulling armor back for routine resupply phases prevents units from becoming entirely stagnant during critical night cycles.
Utilizing Air Support and Artillery Coordination
Firepower is the ultimate decider when breaking stubborn German defensive lines, including elements reminiscent of the historical Panzer Lehr Division. Coordinating artillery preparation with sustained close air support drastically reduces enemy morale and softens entrenched positions before infantry divisions engage in close combat.
Player feedback highlights that heavy carpet bombing should be saved for high-concentration enemy clusters to maximize its psychological and tactical impact. However, commanders must time these air strikes carefully to avoid friendly fire complications and ensure that reconnaissance squadrons have adequately revealed enemy positions beforehand.
Reconnaissance Squadrons
Deploy recon units early to scout dense hedgerow sectors, revealing hidden enemy troop concentrations before committing valuable armor or infantry assets.
Heavy Bomber Wings
Save carpet bombing runs for major engagements where enemy forces are densely packed, creating massive disruption and white-flag surrenders along the front.
Close Air Support
Run extended air support missions spanning 8 to 12 hours over active breakthrough zones to continuously suppress enemy morale throughout day and night cycles.
Executing the Final Withdrawal and Securing Victory
The concluding phase of Operation Cobra shifts from breaking through enemy lines to achieving a successful mass withdrawal and consolidation to the south. Once the primary corridor is established and enemy resistance begins to fracture, commanders must transition infantry units into structured assembly areas.
Managing the final push requires balancing speed with caution. As community veterans note, discovering forgotten auxiliary armor or infantry groups late in the scenario can alter your final mission rating—pushing results from a standard B rank toward higher achievements.
[ ] Confirm all infantry divisions are actively holding their designated sector boundaries.
[ ] Verify that supply corridors leading into St. Lô remain fully secured against counter-incursions.
[ ] Check troop withdrawal numbers to ensure the required minimum units successfully reach the southern extraction zone before time expires.
Frequently Asked Questions
Why do my armored units keep running out of supplies during Operation Cobra?
Attempting overly aggressive deep encirclements causes supply lines to stretch instantaneously. Sticking to direct breakthrough attacks and securing immediate road networks helps maintain functional supply routes.
Is it necessary to encircle St. Lô to win the mission?
Community experiences show that trying to completely encircle St. Lô often results in heavy wear-down and supply failure. A direct, well-supported breakthrough attack followed by systematic ground consolidation is generally more reliable.
Where can I find official game updates and store details?
You can check official platform information and project updates directly via the Battleplan Steam Store Page.