Battleplan Tutorial Guide: Mastering WWII RTS Planning and Mechanics
Master the Battleplan tutorial with our comprehensive guide. Learn pre-mission setups, supply line management, zone orders, and tactical planning.
Published: Battleplan Wiki Editorial Team
Table of Contents
Getting Started with Battleplan: Overcoming Tutorial Hurdles
Pre-Mission Setup Checklist
Build your custom army or use historical units in the army builder.
Assign an officer by dragging them onto the top-level headquarters.
Drag your finalized division from the pre-mission screen into the initial units slot to ensure the start mission button activates.
Diving into a deep World War II real-time strategy game like Battleplan, developed by Foolish Mortals Games Inc., can present initial hurdles, especially during the onboarding phases. Many players encounter roadblocks right at the start, wondering why the mission launch button remains grayed out after constructing an army. According to community reports from experienced wargamers and direct developer insights, this typically happens because an officer has not been properly assigned to the starting division, or the newly constructed unit hasn't been dragged back into the active mission roster.
Before launching into the campaign's third mission or tackling the opening tutorial scenarios, you must ensure your command structure is fully realized. Inside the army constructor, click and drag your chosen officer onto the top-level headquarters node. Once assigned, return to the pre-mission screen and drag your unit into the designated initial units area on the right. Overlooking this vital step will leave you with accumulated army points and an un-launchable setup. Ensuring these prerequisites are met sets the stage for mastering the game's intricate planning mechanics.
Understanding the Planning Phase and Readiness Mode
Toggle Readiness Mode: Choose Readiness mode at the start of a playthrough for a more forgiving, flexible planning system that lets you create new orders throughout the day at the cost of waiting for 100% readiness.
Set Up Supply Hubs: Locate your supply points via the supply overview at the top of the UI, and delete or relocate them closer to the front lines as your armored spearheads advance.
Issue Coordinated Orders: Combine defensive counterattacks to pin enemy forces with offensive breakthroughs and close air support to fracture enemy lines.
Once you successfully bypass the initial setup, Battleplan introduces you to its core mechanic: deliberate tactical planning. Unlike standard real-time strategy titles where units react instantly to clicks, this WWII RTS emphasizes historical accuracy and careful preparation. At the start of each playthrough, you can choose between standard planning and Readiness mode. Community feedback highlights that Readiness mode is much more forgiving, allowing you to create new orders throughout the day. However, these orders require time to reach 100% readiness to execute without penalties.
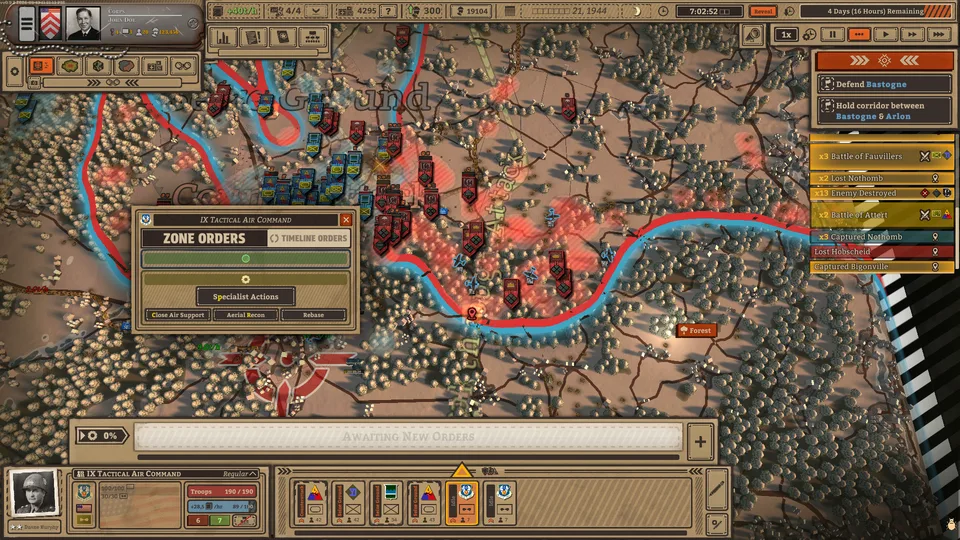
Planning requires you to think several steps ahead. Orders are color-coded—blue for defensive maneuvers, red for offensive actions, and gray for specialist tasks. Each army formation receives a specific color to trace its drawn orders on the map. If you need to adjust operational boundaries, you can grab and pull zone borders using the right mouse button or shift the entire zone with a left click. Always keep the next two steps planned while your current orders execute to maintain momentum across the frontline.
Managing Supply Lines and Logistics
Logistics Pitfalls
Deconstructing and constructing supply hubs takes several real-time minutes; failing to plan relocations will starve your advancing tanks of fuel and ammunition.
Air squadrons require active supply points; moving a supply hub without rebasing nearby air units will result in yellow warning text and severely degraded combat effectiveness.
An army marches on its stomach, and in Battleplan, failing to manage your logistics will grind even the most powerful armored spearhead to a halt. Big maps and missions typically provide only four supply points. As your forces push deeper into enemy territory, you must manually delete rear-facing supply hubs and redeploy them closer to the front. To do this, open the supply overview at the top of the UI, left-click a supply hub, and select the trash bin icon to free up a slot.
Constructing a new supply point takes several minutes of real-time gameplay. Because tanks consume massive amounts of supplies during breakthroughs, positioning these hubs near your armored fist is crucial. Furthermore, pay close attention to non-ground units. Community reports note that if you relocate a supply point shared by air squadrons without rebasing those aircraft to a new operational hub, they will run out of supplies, flash warning indicators, and lose combat effectiveness. Always rebase your air support and reconnaissance planes to match your frontline advances.
Utilizing Reconnaissance, Artillery, and Combined Arms
Effective tactical execution relies heavily on combining different unit types to neutralize fortified enemy positions. When setting up your battle plan, specialized orders require corresponding units within your army formations. For instance, you need scout units for reconnaissance, artillery units for bombardment, and engineers for clearing minefields.
Reconnaissance plays a multi-layered role in your operational success. Utilizing air recon or specialized scouting units reveals enemy positions, placing a binoculars icon next to revealed targets. This marking system decreases enemy morale and defenses while significantly improving the accuracy and damage of your artillery barrages. Additionally, scouting uncovers enemy supply points, allowing you to plan targeted captures that cut off enemy forces from vital resources.
When preparing an offensive breakthrough, synchronization is vital. You can use infantry divisions with defensive counterattack orders or "seize ground" commands to pin enemy units in place, draining their morale and preventing them from reinforcing threatened flanks. Once the enemy is softened up by artillery fire and reduced fortifications, your armored divisions can execute a breakthrough order to punch through enemy lines, followed immediately by infantry to mop up isolated pockets of resistance.
Frequently Asked Questions
Why is the start mission button grayed out in the tutorial?
The button remains grayed out if you have not assigned an officer to your division's headquarters inside the army constructor, or if you failed to drag the completed division into the initial units deployment slot on the pre-mission screen.
How do I capture towns during the early tutorial missions?
Early tutorial missions often require an "Assemble" order directed squarely into the objective area. If your units stop fighting or fail to capture the town, ensure they reached the center of the designated zone, or use the "Reset Plan" button on the right-hand side to reissue the order.
Where can I find official updates and community discussions for Battleplan?
You can visit the official Battleplan Steam Store Page to check global achievements, review developer announcements, and participate in community discussions.