Mastering Battleplan: A Guide to Strategy, Logistics, and Command
Learn how to master Battleplan, the immersive WW2 real-time strategy game. Discover expert tips for drawing tactical plans, managing logistics, and optimizing your chain of command.
Published: Battleplan Wiki Editorial Team
Table of Contents
Understanding the "Battleplan" Command Philosophy
Battleplan, developed by Foolish Mortals Games Inc. and published by Slitherine Ltd., offers a unique approach to real-time strategy (RTS) gaming. Unlike traditional RTS titles where you might click units to move them individually, Battleplan tasks you with the role of a high-level commander. The game, released on October 12, 2026, focuses on simulating massive, month-long engagements where you draw your intentions directly onto the map, and your units—guided by their officers—carry them out autonomously.
The core gameplay loop involves analyzing the terrain, understanding your supply situation, and creating "regimental plans." Because the game simulates battles second-by-second and day-by-day, you have the flexibility to pause, play in real-time, or fast-forward to observe how your orders unfold. Success here isn't about the fastest "click-per-minute" (APM); it is about your ability to plan, anticipate enemy movements, and maintain your logistics chain.
Drawing Your Strategy: The Regimental Plan System
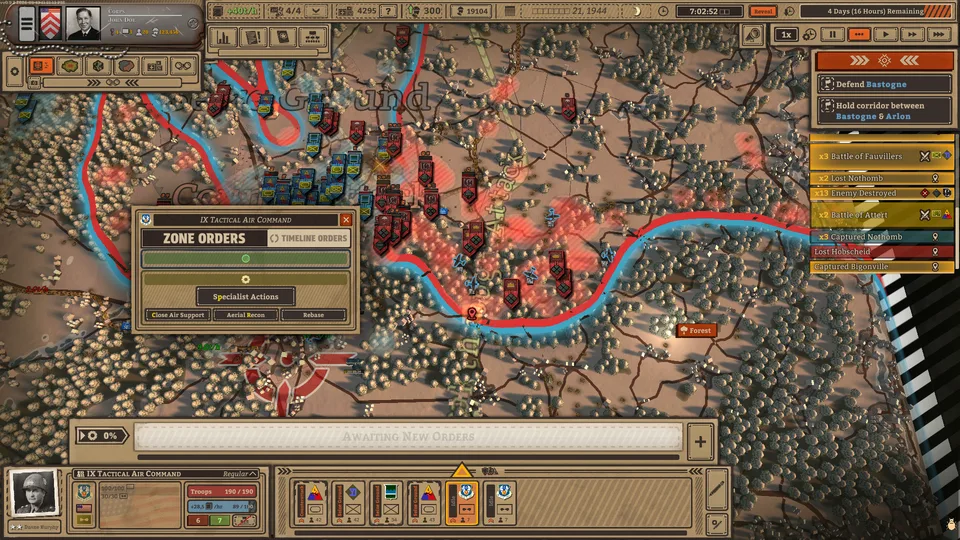
The signature mechanic of the game is the ability to draw orders directly on the map. This isn't just a visual aid; it is how you issue commands. When you draw an area, you are defining a zone of operations for your regiments.
How to Execute a Regimental Plan
Select Units: Click on the division or unit you wish to command from the bottom bar.
Choose the Order Type: Select the desired tactical behavior (e.g., "Seize Ground," "Breakthrough," "Hold Line").
Draw the Zone: Hold the left mouse button and draw the area on the map where you want the units to operate.
Adjust Tactics: Once drawn, you can right-click and drag to adjust the shape of the zone. You can also change the specific tactic for sub-zones if needed.
Confirm/Execute: Click the "Execute" button to finalize the plan. Your units will interpret these instructions and begin their maneuvers.
It is important to understand that "Seize Ground" is different from "Breakthrough." A "Seize Ground" order might see your units push forward, but they could become disorganized or expose themselves if not supported. Always ensure your plans are realistic. If you draw a plan that requires your troops to move through enemy territory without proper artillery support, they will likely stall or suffer heavy casualties against fortified positions.
Logistics and Supply: The Backbone of Your Advance
One of the most common pitfalls for new players is neglecting the supply line. In Battleplan, supply is not infinite; it is a physical resource that must flow from your depots to your front-line units.
Tip
Monitor Your Supply Lines: Always keep the "Supply View" enabled when planning offensives. Look for green paths indicating healthy supply flow and red paths indicating a deficit. If your units are in the red, they will suffer attrition, lose morale, and eventually surrender, regardless of how well they are fighting.
You start with supply depots, but as you push deeper into enemy territory, these lines get stretched. You must proactively place new supply depots near your advancing units. If your units are running low, order them to retreat or hold until a supply line is established. Capturing enemy supply hubs is a strategic priority; doing so not only boosts your own logistics but also starves the enemy, forcing them to surrender more quickly.
Combat Mechanics and Combined Arms
The game simulates WW2 combat with a focus on realism. You cannot simply throw infantry at a fortified bunker and expect to win. Infantry are the backbone of your army, great for holding ground and defense, but they are highly vulnerable on the offensive without support.
The Role of Specialist Units
To break through enemy lines, you must employ a "combined arms" approach. This means coordinating different unit types to complement each other's strengths and weaknesses.
Artillery
Essential for softening up enemy fortifications before an infantry assault. They provide massive stat penalties to enemies, lowering their firepower. However, they are vulnerable in close quarters, so keep them protected.
Engineers
These units are vital for offensive operations. They can clear minefields, which would otherwise devastate your advancing troops, and construct improved fortifications. Always include engineers in your attack plans against prepared enemy positions.
Scouts
Use scouts to move ahead of your main force. They automatically tag enemy units, providing you with the intel needed to draw accurate plans. They also provide movement speed bonuses to nearby friendly units.
Anti-Tank Guns
Specifically designed to hunt enemy armor. If you are facing mechanized threats, these are non-negotiable. They also provide a "fortification destruction" bonus, making them useful even against stationary defenses.
When engagement occurs, units fight automatically based on their orders and proximity. If you notice a unit's morale dropping (indicated by the bar in the unit panel), it is a sign that they are losing the fight or are under-supplied. Don't hesitate to order a retreat if a position becomes untenable.
Advanced Tactics: Officers and Chain of Command
Your army is organized into a hierarchy. Each division is led by an officer, and their traits can drastically change your combat effectiveness. For example, an officer with "Sharpshooting" traits will grant infantry a damage bonus, while "Reliable" officers might boost defense at the cost of movement speed.
Managing the Chain of Command
You are not locked into the default organization. You can customize your chain of command by splitting and merging units.
Merging: Drag one division icon onto another to combine them into a larger corps. This makes commanding large groups easier, as you can issue a single order for the entire formation.
Splitting: If a division is too large or you need to cover multiple objectives, use the "Split" button. This allows you to detach regiments or companies to perform independent tasks, such as capturing a flank or guarding a supply depot.
Officer Management: Keep your officers alive. As they gain experience (veterancy), they become more effective. If an officer is killed or wounded, the entire formation may suffer a penalty or become temporarily paralyzed.
FAQ: Frequently Asked Questions
Is Battleplan a real-time game?
Yes, it is a real-time strategy game. However, it features time manipulation tools, allowing you to pause, play at normal speed, or fast-forward to manage your plans effectively.
Can I play this game like a sandbox?
While the missions are based on historical engagements and are somewhat structured, the gameplay within those missions offers significant freedom. You can choose how to approach objectives, making it feel "sandboxy" in terms of tactical execution.
What is the primary difference between the tutorial and the campaign missions?
The tutorial missions (like Exercise Tiger and Exercise Fabius) are designed to teach you mechanics like supply management, encirclement, and specialist actions. Campaign missions are more complex and require you to manage your own army's composition and officer recruitment.
Do I need to micromanage every unit?
No. Battleplan is designed for high-level command. You draw the plan, and your units execute it autonomously. Micromanagement is generally reserved for correcting errors or reacting to unexpected enemy maneuvers.
By understanding these fundamentals—logistics, combined arms, and the regimental planning system—you will be well-equipped to handle the challenges of the Western Front. Remember, in Battleplan, the pen is mightier than the sword, provided you know where to draw the line.