Battleplan First Battle Guide: Mastering Orders, Supply, and Defense
Learn how to master your first battle in Battleplan with this comprehensive tactical guide covering regimental plans, supply lines, and basic drills.
Published: Battleplan Wiki Editorial Team
Table of Contents
Introduction to Your First Battle in Battleplan
When stepping into your first major operational challenge in Foolish Mortals Games Inc.’s real-time strategy simulation, understanding how to transition from basic drills to active combat is vital. The initial phase of the campaign—specifically tutorial scenarios like Exercise Tiger—is designed to teach you how mechanics flow together without risking your primary standing army. According to player experiences and gameplay breakdowns, success relies heavily on utilizing map-drawing tools properly rather than managing individual micro-actions.
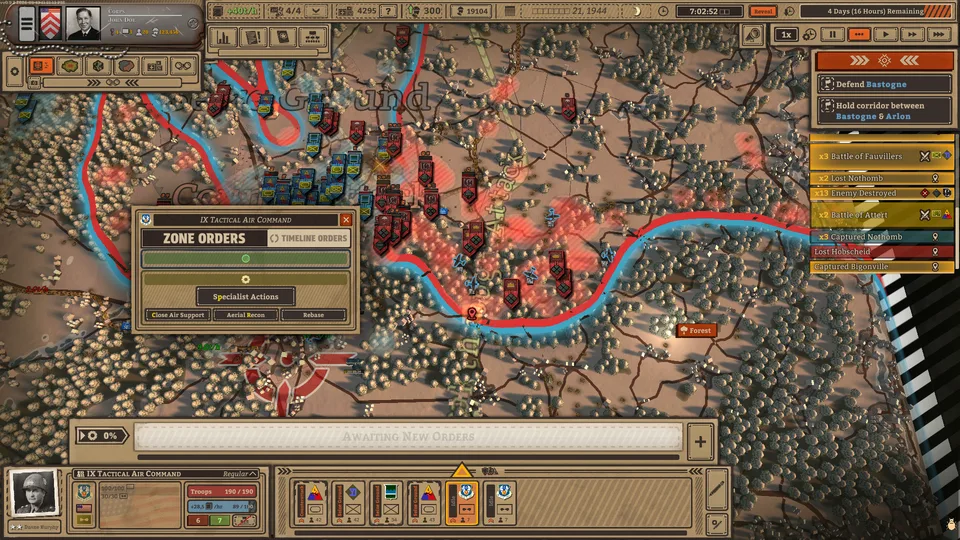
Your initial mission takes place in Devon, UK, preparing troops for D-Day objectives. Rather than letting units fight blindly, the simulation requires you to create structured regimental plans. By dividing your forces into designated zones with specific tactics—such as balanced hold or reserve deployment—you can establish stable front lines and effectively brace for enemy counterattacks.
Executing Your First Regimental Plan
Open the army constructor or map interface to inspect your starting divisions and assigned officers.
Click and drag your cursor over the map to draw an area between your front lines and your objective (such as Honiton) to block enemy advancement.
Assign specific zone tactics, such as switching from seized ground to a balanced hold depending on intelligence reports.
Click execute to let your units autonomously build fortifications and engage enemies within the drawn zone parameters.
Understanding Unit Roles and Combined Arms
A common pitfall for newcomers is treating all units as general-purpose combatants. In this title, each division type—from standard infantry to specialized engineering and artillery units—serves a strict role. Community reports emphasize that infantry alone will struggle heavily against fortified enemy positions unless properly supported.
Infantry form the backbone of your defensive lines, automatically digging foxholes and fortifications when stationary. However, they possess low offensive mobility and require heavy support.
Infantry & Headquarters
Primary frontline holders. Excellent on defense and automatically construct field fortifications, but require artillery support to crack enemy strongpoints. Headquarters units stay behind the lines to grant vital stat bonuses, though losing them can paralyze entire groups if the commanding officer is wounded or killed.
Artillery & Engineers
Long-range assets capable of delivering devastating barrages that lower enemy firepower and morale. Engineers specialize in clearing and laying minefields, as well as constructing improved fortifications to anchor your advancing lines.
Scouts & Anti-Tank Guns
Highly mobile units that automatically scout ahead to reveal enemy troop movements and routing paths. Anti-tank units target armored threats, providing necessary firepower boosts when positioned alongside infantry formations.
Managing Supply Lines and Logistics
Mastering combat is only half the battle; keeping your forces supplied dictates how far your offensives can reach. As highlighted in community walkthroughs, pushing too far past your supply depots creates elongated supply lines that severely penalize your combat effectiveness.
When your units display red supply indicators, they are consuming more resources than they receive, which leads directly to attrition, low morale, and eventual surrender. To maintain momentum during extended operations, you must manage logistics deliberately:
Monitor Supply View: Regularly toggle the supply overlay to track flow from hubs to frontline units.
Establish Depots: Place new supply depots near reserve areas and active roads to shorten supply chains.
Pull Back When Low: Order exhausted or starving units to retreat toward supply centers before they suffer permanent casualties.
Exploit Enemy Hubs: Capture enemy supply hubs and depots during encirclements to deny them resources while bolstering your own reserves.
Advanced Maneuvers: Encirclement and Exercise Fabius
Once you complete introductory training exercises, you will transition to advanced drills like Exercise Fabius, which introduces complex mechanics such as multi-stage attacks, encirclements, and supply denial.
Instead of executing direct frontal assaults against heavy enemy fortifications—which often results in high casualty rates and broken morale—you should utilize map-drawing tools to completely surround hostile pockets. Cutting off an enemy division isolates them from off-map supplies, drastically accelerates their surrender rate, and triggers attrition damage.
Tip
When drawing extensive attack zones, splitting your forces into multiple regimented areas prevents your units from bunching up or swirling uselessly around a single focal point. Always ensure your scouts and engineers prepare the terrain with artillery barrages and mine clearance before sending heavy armor into contested urban sectors.
Frequently Asked Questions
Do I need to manage individual soldiers in Battleplan?
No. The simulation focuses on high-level operational command. You draw plans, set zone tactics, and assign overarching objectives, while your officers and companies carry out movements and engagements autonomously.
How do I prevent my units from running out of supplies?
Keep a close eye on the blue supply status bar in your division panels. Construct new supply depots closer to the front lines, avoid over-extending past your supply range, and capture enemy depots during successful encirclements.
What should I do if an attack fails due to heavy enemy fortifications?
Fall back using the retreat command rather than pressing a hopeless frontal assault. Use the time to perform preparatory artillery bombardments, clear minefields with engineers, and establish a fresh tactical plan before trying again.