Battleplan Strategy Guide: Mastering High-Level Command and Logistics
Learn how to master Battleplan's unique RTS mechanics, from drawing intuitive regimental plans to managing complex supply lines on the Western Front.
Published: Battleplan Wiki Editorial Team
Table of Contents
Understanding the Command Philosophy
Battleplan, developed by Foolish Mortals Games Inc. and published by Slitherine Ltd., offers a distinct departure from traditional Real-Time Strategy (RTS) titles. If you are coming from games like StarCraft or Age of Empires, you might be accustomed to clicking on individual soldiers to move them or telling a specific tank to fire at a specific target. In Battleplan, that level of micromanagement is not only unnecessary but counterproductive.
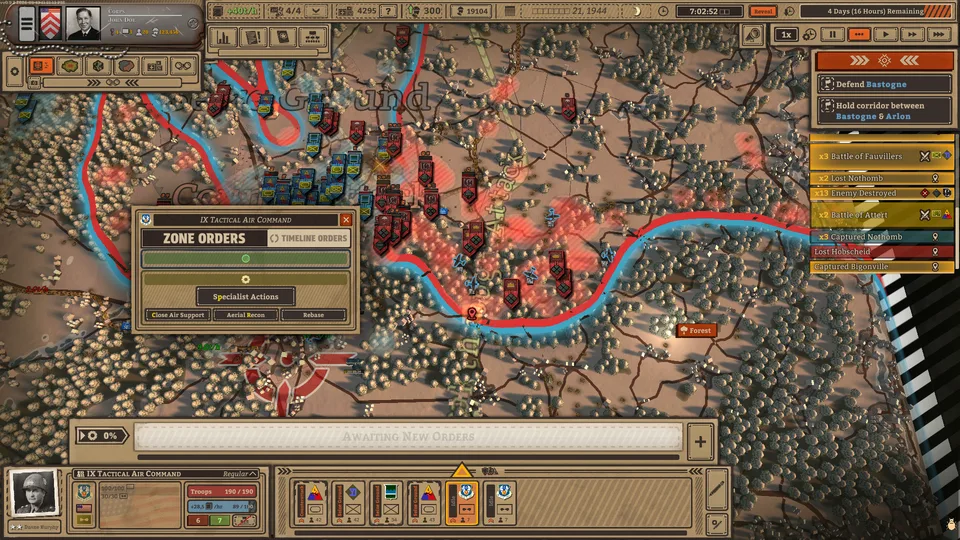
The game simulates WW2-era combat by placing you in the role of a high-level commander. You are not moving individual squads; you are issuing orders to divisions and regiments. Your officers and subordinate units interpret these orders and carry them out autonomously, considering terrain, morale, and supply availability. Understanding this shift is the first step toward success. You are the strategist, not the platoon leader.
Mastering Regimental Plans
The heart of Battleplan is the ability to draw your intentions directly onto the map. This is where you define the scope and intent of your offensive or defensive maneuvers. Instead of issuing a "move-to" command, you draw a "Regimental Plan."
How to Create an Effective Regimental Plan
Select Your Formation: Click on the division or unit you wish to command.
Initiate Planning: Use the planning tool to draw a boundary on the map where you want your units to operate.
Assign Tactics: Choose from various tactical modes such as "Seize Ground," "Breakthrough," "Hold Line," or "Encircle."
Refine Zones: If your drawn area is large, the game may split it into multiple zones. You can adjust these zones to ensure specific regiments are covering specific objectives.
Execute: Once the order is drawn, your units will begin to move and act according to the assigned tactic, adapting to the terrain and enemy resistance along the way.
One common mistake for new players is drawing one massive zone for the entire army. Gameplay observations suggest that breaking your plan into smaller, specific zones allows for better coordination. For example, assigning one regiment to "Seize Ground" while another provides a "Breakthrough" support role is significantly more effective than ordering everyone to simply "Seize Ground" at once.
The Logistics of War: Supply and Attrition
Logistics in Battleplan is not a background mechanic; it is the primary driver of combat outcomes. Units cannot fight indefinitely. They require a steady stream of supplies—fuel, ammunition, and food—to maintain combat effectiveness.
When you look at the supply view, pay close attention to the colors. Green indicates your units are receiving adequate supplies; red indicates they are consuming more than they are receiving, which will lead to a rapid degradation in combat capability.
Managing Supply Lines
Placement: Always place supply depots near your advancing front lines. As your units push forward, your supply lines stretch, becoming vulnerable.
Cutting Lines: The most efficient way to defeat a fortified enemy is not a head-on assault but an encirclement. By cutting off their supply hubs, you force them into a state of attrition. Once a unit is cut off, its morale will plummet, and it will eventually surrender or be destroyed without requiring a costly direct assault.
Resupply: If your units are low on supplies, do not hesitate to pull them back or order a resupply action. Engaging an enemy while your supply bar is depleted is a recipe for disaster.
Unit Management and Chain of Command
The game allows for a high degree of customization regarding your army’s structure. You can merge units into a Corps for easier management or split them down to the company level for specialized tasks.
Your officers are equally important. Each officer has unique traits—some are reliable and boost defense, while others may be better suited for aggressive maneuvers. Keep your officers alive; they gain veterancy (and quirks) over time, making them more effective in subsequent missions. If a headquarters unit takes casualties, there is a risk the commanding officer could be wounded or killed, temporarily paralyzing the entire formation.
Chain of Command Best Practices
Merge for Power: Combine divisions into Corps when you need to punch through a strong defensive line.
Split for Flexibility: Break units apart to cover wider fronts or to perform specialized tasks like scouting or clearing minefields.
Protect HQs: Headquarters units are logistical hubs. Keep them behind the front lines. Losing your HQ can cripple the formation's ability to coordinate and receive supplies.
Monitor Traits: Check your officer portraits regularly. Understanding their specific bonuses (e.g., increased defense or damage) helps you decide which formation to assign to a specific sector.
Combat Tactics and Terrain
The Western Front in 1944 is modeled with high fidelity, meaning terrain plays a massive role in your success. Forests and cities provide defensive bonuses, while open ground or swamps can be death traps for infantry.
When attacking, use "Specialist Actions" to soften up the enemy. Before ordering a general assault, use artillery barrages to suppress the enemy's firepower or have engineers clear minefields. Sending infantry into an uncleared minefield or against a fortified position without artillery support will result in unnecessary casualties and mission failure.
Combat Factors to Consider:
Time of Day: Units do not like to enter enemy territory at night. Visibility is reduced, and movement slows. Use the night cycle to rest your troops or set up defensive positions.
Morale: If a unit's morale hits zero, they will retreat or surrender. Protect your units from being surrounded, as this is the fastest way to break morale.
Combined Arms: Infantry, tanks, engineers, and artillery should work together. Infantry holds ground and defends, while tanks provide the punch. Engineers clear paths, and artillery provides the suppression necessary to make an attack viable.
Frequently Asked Questions
How do I know if my attack plan is going to succeed?
When you draw an order, the game provides an estimated outcome based on current forces, fortifications, and terrain. Look at the predicted outcome bars. If the odds are heavily against you, consider adding support actions like artillery or scouting before executing the plan.
Can I control units manually?
Battleplan is designed for high-level command. While you can issue manual move orders to adjust positions, the core gameplay loop relies on your units autonomously executing the plans you draw. If you find yourself constantly needing to move individual units, you may need to adjust your Regimental Plans.
Why are my units retreating?
Retreat is usually caused by low morale or a lack of supplies. Check if your unit is cut off from a supply depot or if they have taken heavy casualties. If they are in a "red" supply state, they are likely suffering from attrition and need to be pulled back to a supply depot.
Is the tutorial representative of the full campaign?
Yes, the tutorial missions (like "Exercise Tiger" and "Exercise Fabius") introduce the core mechanics—drawing plans, managing logistics, and using specialist actions—that you will use throughout the 10+ massive historical battles in the full game.