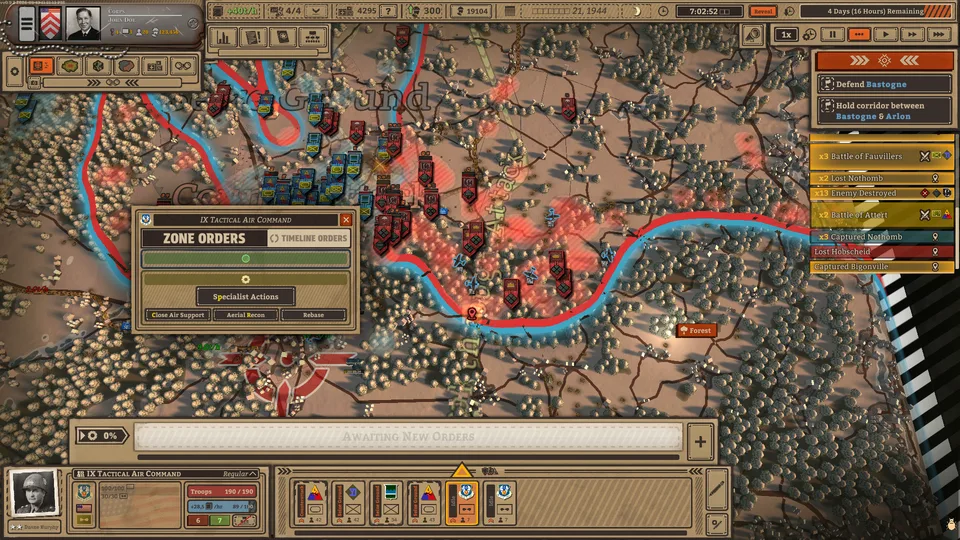
Battleplan Demo Missions and Tactical Planning Guide
Master tactical planning, supply management, and campaign execution in Battleplan with this comprehensive mission guide and strategy breakdown.
Published: Battleplan Wiki Editorial Team
Table of Contents
What Are the Battleplan Demo Missions?
Core Mission Planning Workflow
Assess Supply Lines: Locate existing supply hubs using the supply overview interface and reposition them close to advancing armored units.
Draw Initial Orders: Assign defensive counterattacks to pin enemy forces and use air reconnaissance to expose enemy positions and supply points.
Execute Breakthroughs: Activate tank spearhead orders while ensuring infantry divisions follow closely behind with seize-ground commands to mop up isolated pockets.
Plan Two Steps Ahead: Due to readiness delay mechanics, continuously queue subsequent orders while current ones execute to maintain offensive momentum.
Understanding Tactical Operations and Mission Flow
Tackling complex operations in Battleplan developed by Foolish Mortals Games Inc. requires a shift from micro-management to high-level strategic oversight. Rather than moving individual soldiers manually, commanders draw multi-step plans directly onto maps based on real-world geographic data. Whether you are working through early tactical scenarios or pushing deep into enemy territory during campaign operations, success depends entirely on how well you balance preparation phases, logistical supply chains, and unit automation.
Community reports and gameplay guides emphasize that mission success relies on pacing your offensives. Because units operate autonomously once orders are executed, your primary job is to establish robust orders—such as defense-in-depth, counterattacks, and planned breakthroughs—while keeping your forces adequately supplied across extensive Western European theater battlefields.
Managing Supply Hubs and Logistics
An army marches on its stomach, and in this game, frontline units quickly lose morale and combat effectiveness if they outpace their supply lines. Even on large maps, players are typically limited to a handful of active supply points at any given time.
Warning
Deconstructing and reconstructing supply points takes several minutes of real-time operation. Avoid dismantling your only operational hub without having a replacement ready closer to the front, or your advancing tanks and infantry will suffer severe operational penalties.
To optimize your logistics during extended missions, follow these steps:
Open the supply overview at the top of the screen to monitor active hub distribution.
Remove redundant or backline supply points by clicking the trash bin icon once a territory is secured.
Relocate supply hubs closer to armored spearheads so heavy divisions do not stall out when breaking through enemy lines.
Remember to rebase air squadrons when moving related supply infrastructure to prevent aircraft from running out of operational supplies.
Executing Multi-Step Orders and Breakthroughs
Effective mission execution relies on synchronizing different army formations—including infantry, armor, engineers, and artillery—to work in tandem. According to community insights, launching a successful offensive requires pinning enemy forces in place before exploiting weaknesses with mobile armor.
Defensive Pinned Operations
Assign counterattack or defend orders to center and flank infantry formations. This draws enemy units into localized skirmishes, draining their morale and fixing them in place so they cannot respond to your primary offensive thrust elsewhere.
Armored Breakthroughs
Once enemy frontlines are softened by artillery barrages and air reconnaissance, task your armored divisions with a breakthrough order. Direct them deep into enemy rear lines to fold their flanks and isolate opposing forces from supply hubs.
The Importance of Readiness Modes
When starting a playthrough, choosing the right planning mode alters how aggressively you can push. The Readiness mode requires orders to reach 100% readiness before execution if you want to avoid penalties, but it permits continuous order creation throughout the day. Because preparing and executing plans takes time, successful commanders always stay one step ahead—planning the next two operational phases while current orders unfold on the battlefield.
Utilizing Air Support and Reconnaissance
Air assets provide critical advantages that can turn the tide of a difficult mission. Proper utilization of aircraft involves a three-tier scouting and support loop:
Aerial Reconnaissance: Drawing scouting orders behind contact lines reveals hidden enemy positions, exposes supply depots, and marks units with binoculars, reducing their defense and morale while boosting subsequent artillery accuracy.
Close Air Support: Coordinate fighter-bombers and attack aircraft to follow your tank divisions, hammering enemy resistance along breakthrough paths.
Bomber Coordination: Use heavy assets to break stubborn fortifications and reduce enemy unit fortification percentages before infantry divisions move in to seize ground.
FAQ
How do I reduce enemy fortification levels during a mission?
Enemy units entrenched in a single position accumulate fortification percentages that make frontal assaults costly. You can reduce these defensive bonuses by targeting them with coordinated artillery barrages before ordering infantry or armor to advance.
Can I play as factions other than the Allies?
While the main campaign focuses on the Liberation of France from the Allied perspective, individual tactical scenarios allow players to take command of German forces as well.
How do I prevent my air units from running out of supplies?
If you relocate or dismantle a supply point that your air squadrons rely upon, you must manually issue a rebase order to a new active supply hub, or your aircraft will become grounded and ineffective due to supply exhaustion.